HPTLC PRO Module
Aside of the access from the Instruments Toolbox, it is also possible to open with:
It is accessible by double clicking on:
double clicking on the module icon in the HPTLC PRO SYSTEM Configuration window.
double clicking on the schematic view of the module in the HPTLC PRO SYSTEM Details window.
Properties tab
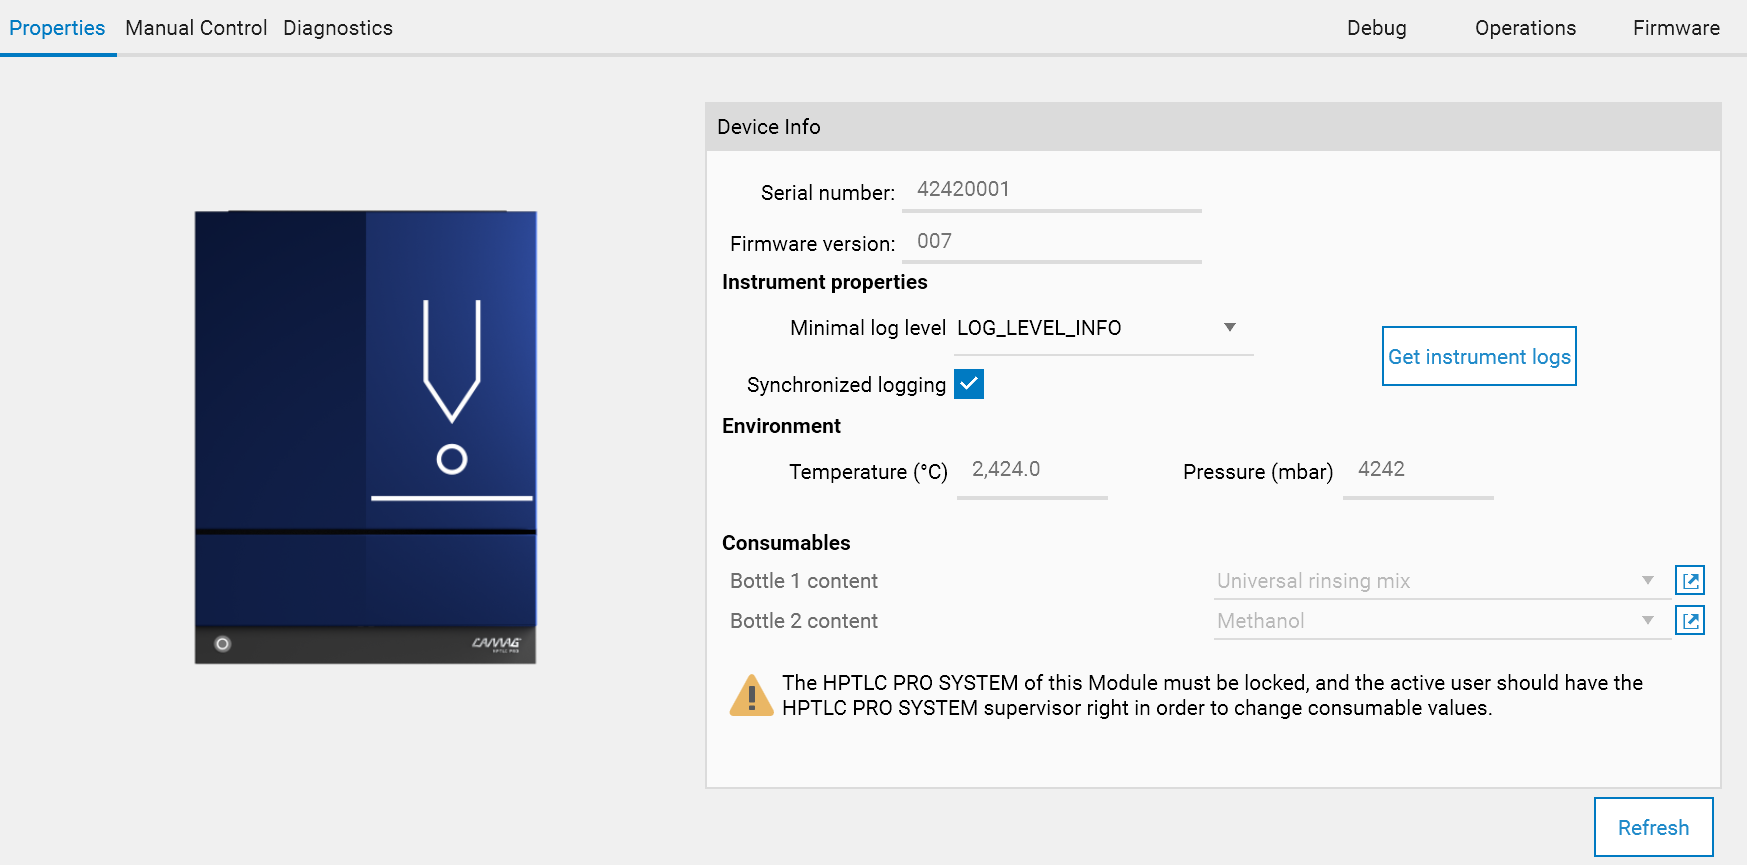
The tab displays the following information:
Like for other instruments, some high-level information about the instrument (serial number and firmware version)
An Instrument properties section allows to configure and retrieve the instrument log stored in the Instrument’s internal memory.
Each HPTLC PRO Module has its own log file, stored directly in the internal memory of the instrument. There are 2 possibilities to get the contents of this log:
Use the Get instrument logs button to get the log contents directly.
Activate the Synchronized Logging mode. In this mode, the HPTLC PRO Modules send immediately each log message to the connected host (HPTLC HPTLC PRO Module service) which, in turn, writes the log message contents in a dedicated log file.
Pros:
With the synchronized logging, much more logs are stored, because the size of the log file in the internal memory of the instrument is small
With the synchronized logging, each message log gets a timestamp, whereas the HPTLC PRO Modules don’t have this function (they can only count the number of milliseconds elapsed since the instrument was started)
Cons:
Synchronized logging only works when the instrument is connected and initialized. Therefore, it cannot be used to troubleshoot initialization problems.
The Consumables values of the instrument (see Consumables validation).
Manual control tab
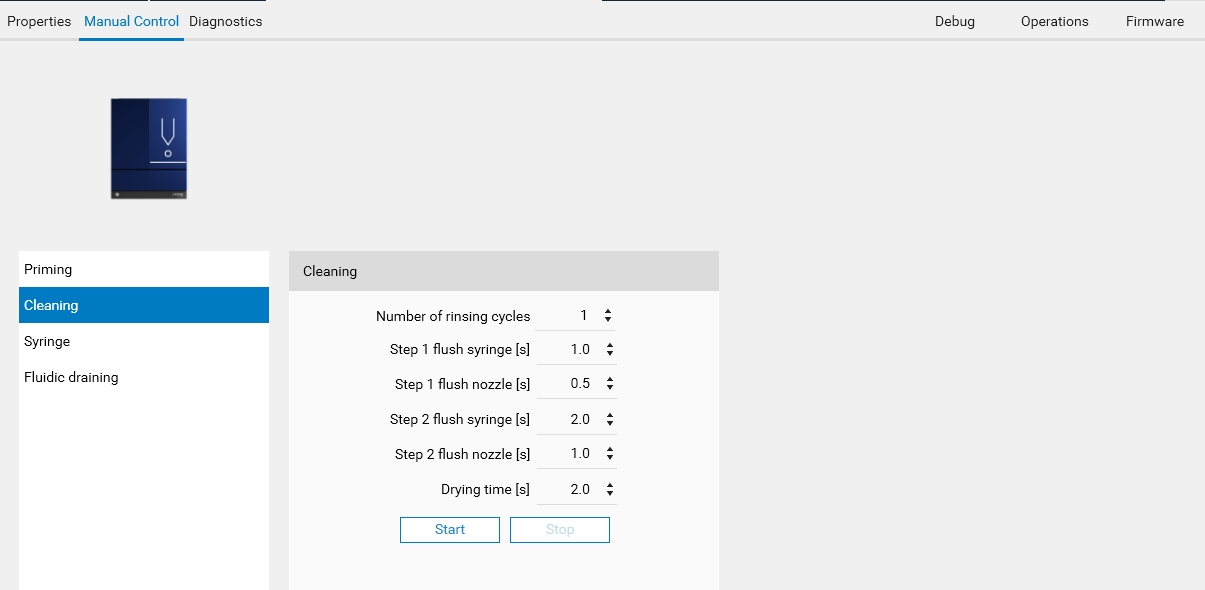
Like other instruments, the Manual Control tab gives access to special instrument commands.
HPTLC PRO APPLICATION
The manual Cleaning operation
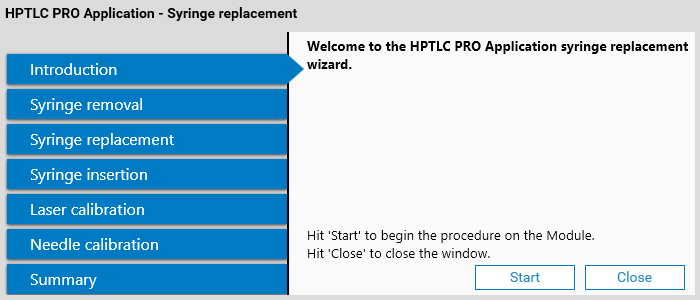
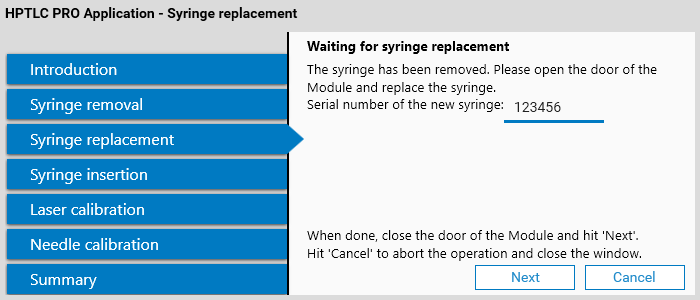
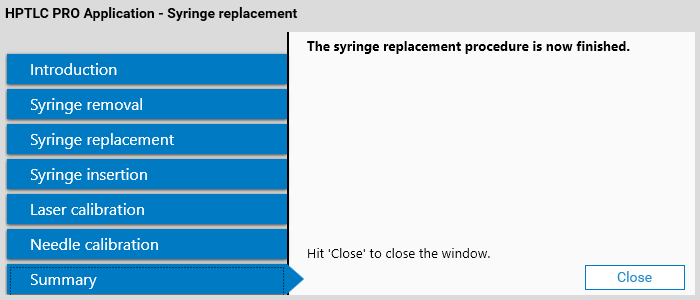
The Syringe replacement commands, necessary to replace the syringe. A wizard will guide you for the different steps:
Syringe serial number should be entered:
Calibration:

The solvent rinsing operation
HPTLC PRO DEVELOPMENT
The priming operation
The manual Cleaning operation.
The solvent pump power evaluation, to test pump settings for a new solvent
The dumping operation
Diagnostics tab
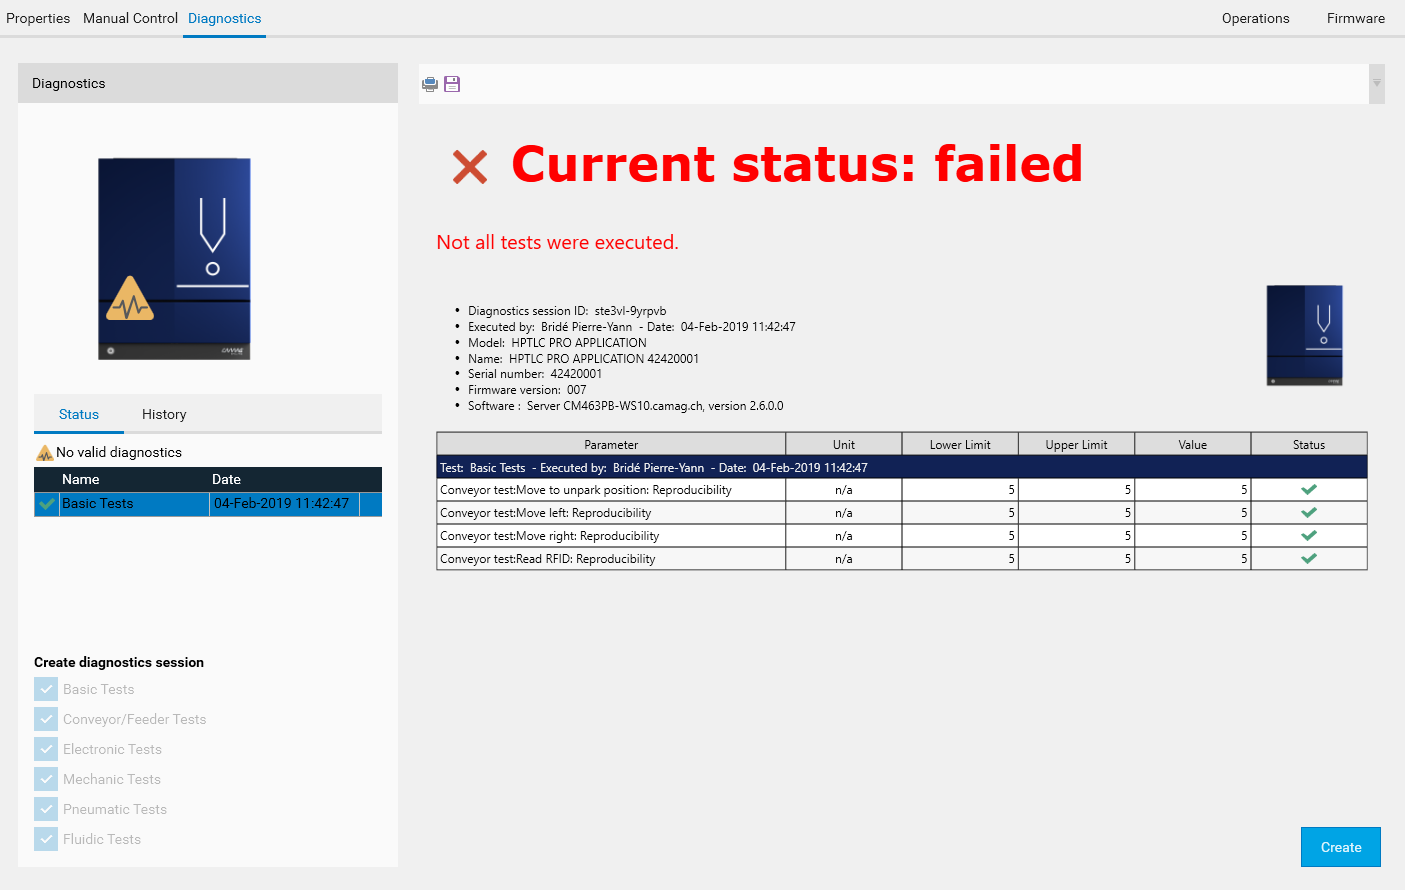
Like other instruments, the Diagnostics tab performs instrument diagnostics.
Operations tab
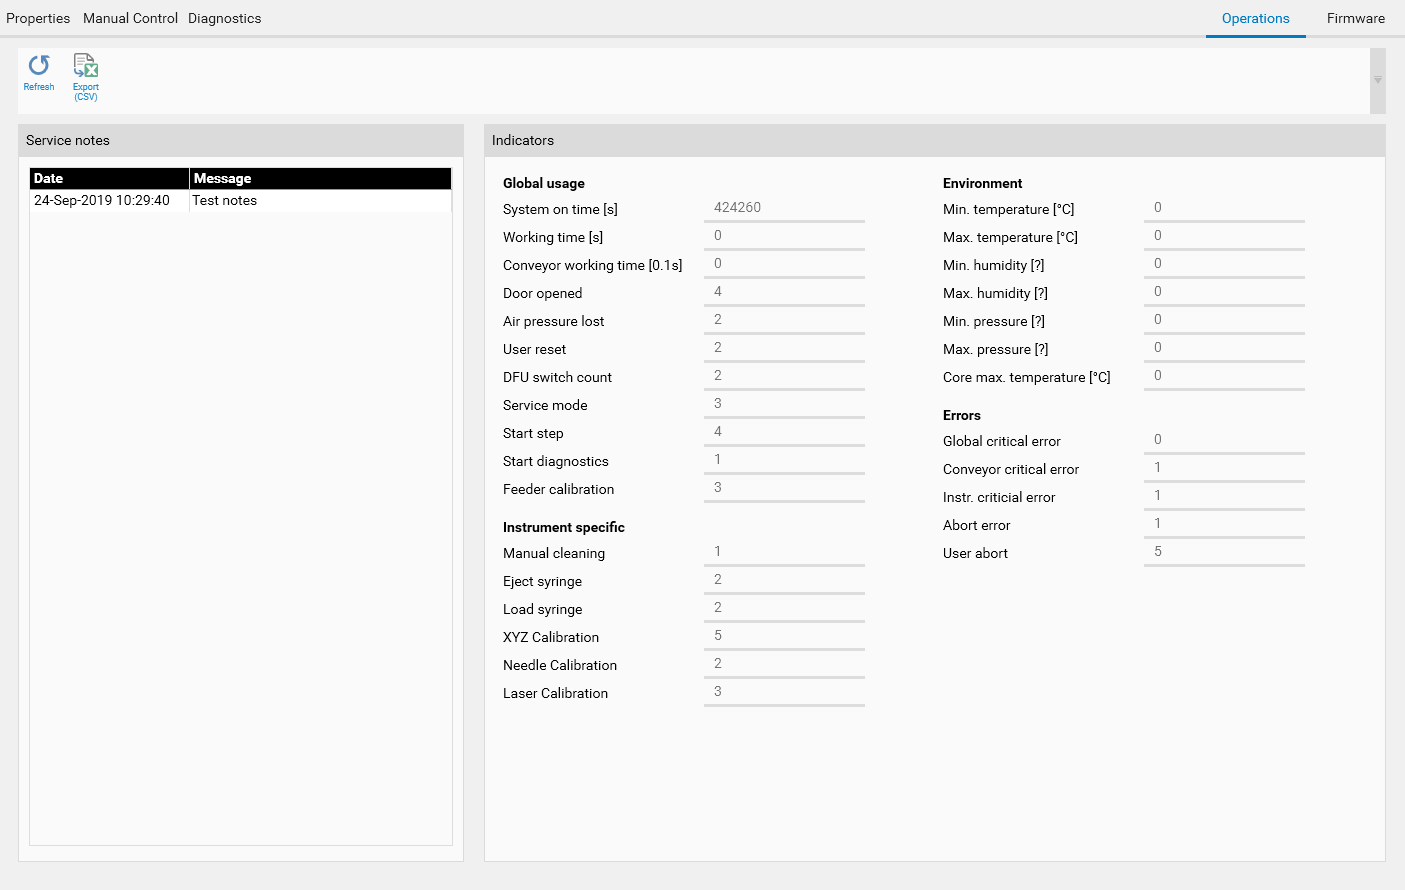
The Operations tab displays information and counters stored on the HPTLC PRO Module itself and is therefore useful for service purposes and to follow the state of the instrument over the time:
The Service notes section contains up to 10 service messages. Messages are characterized by a timestamp and a simple text, and can be entered by service person. Service notes can be typically used to document a hardware change on the instrument.
The Indicators section details the different counters available. Some counters, such as System on time, are regularly updated (currently every 10 minutes) while others, such as Door opened correspond to an event and are updated immediately.
Firmware tab
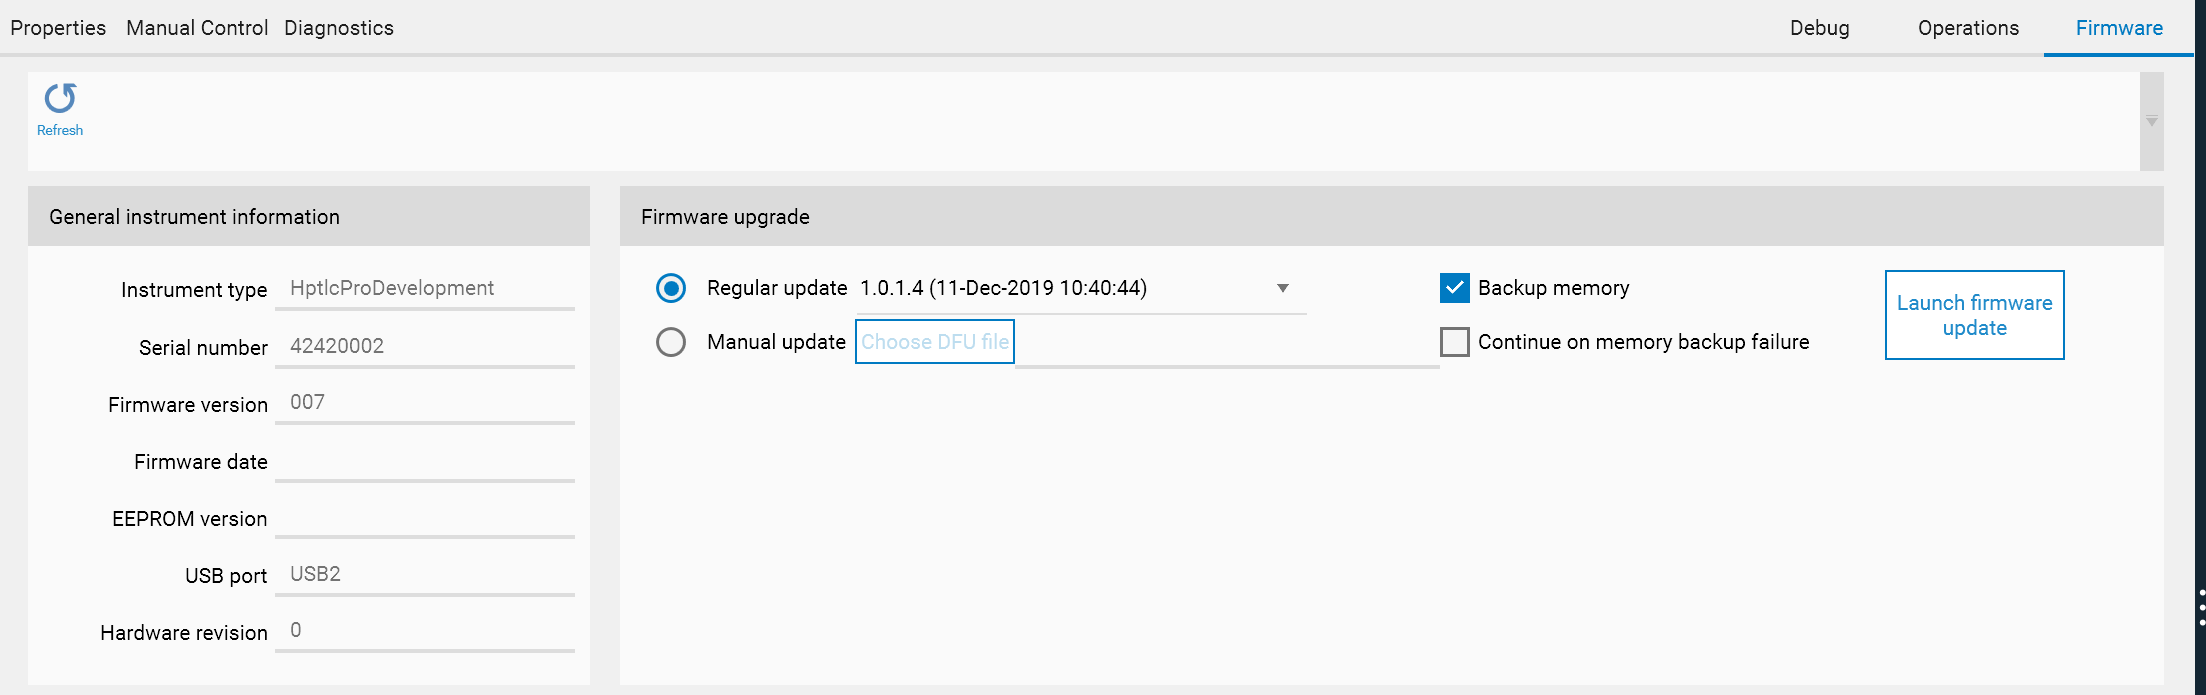
The Firmware tab is mainly used to perform firmware upgrades.
The General instrument information panel details advanced versioning information of the currently connected HPTLC PRO Module.
The main Firmware upgrade part enable firmware upgrade within visionCATS by offering the 2 main options:
The Regular update option used to install a version provided directly by visionCATS. Indeed, visionCATS includes the latest firmware for each HPTLC PRO Module. This way, it is possible to upgrade the firmware of HPTLC PRO Modules after installing a new version of visionCATS.
In case of new firmware versions coming between two visionCATS releases, for example to include corrections, the Manual update option allows the user to specify the .dfu file directly.
The Backup memory and Continue on memory backup failure options provide an additional security to be able to recover from errors during firmware upgrade. When Backup memory is checked, the firmware update procedure will first perform a full backup of the contents of the memory and save it in the RomBackup folder inside the installation folder. If something goes wrong during the update, pease contact CAMAG Support to revert back to the old firmware manually and restore the backup.
During the firmware upgrade, the window shows the progression and the procedure waits for the device to come back in App mode.