Configure network share for scheduled backup
Important
The following configuration will only work if you have Active Directory, i.e. the computers should be in a domain.
Network architecture
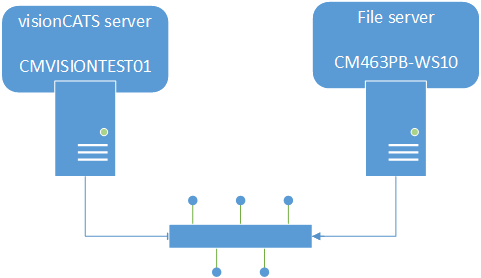
For saving backup on a network share, you will need two computers in the same domain:
- Computer A: with visionCATS server
In the following screenshots, it will be CMVISIONTEST01.
- Computer B: a file server with a network share
In the following screenshots, it will be CM463PB-WS10.
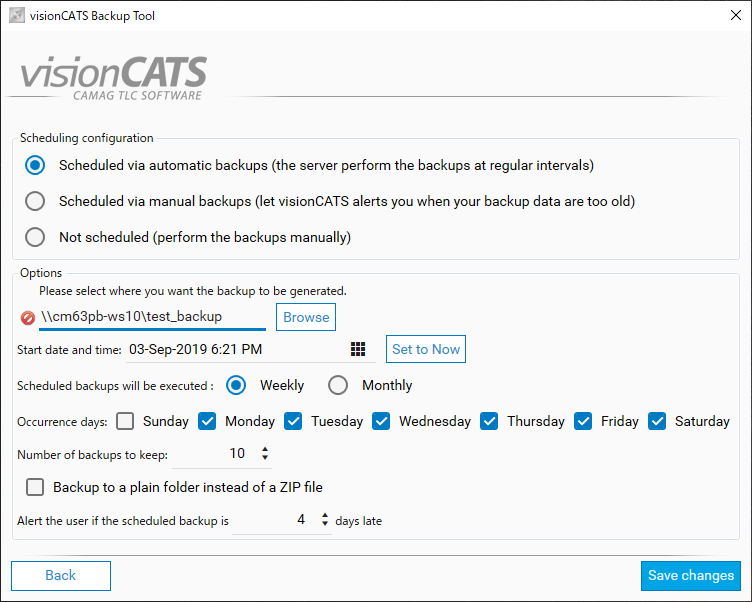
Setting backup folder
On computer A, if the network share don’t exist or don’t have correct rights, it will be marked as an inaccessible folder:
Creating the network share with correct rights
Important
The network share will be created on computer B.
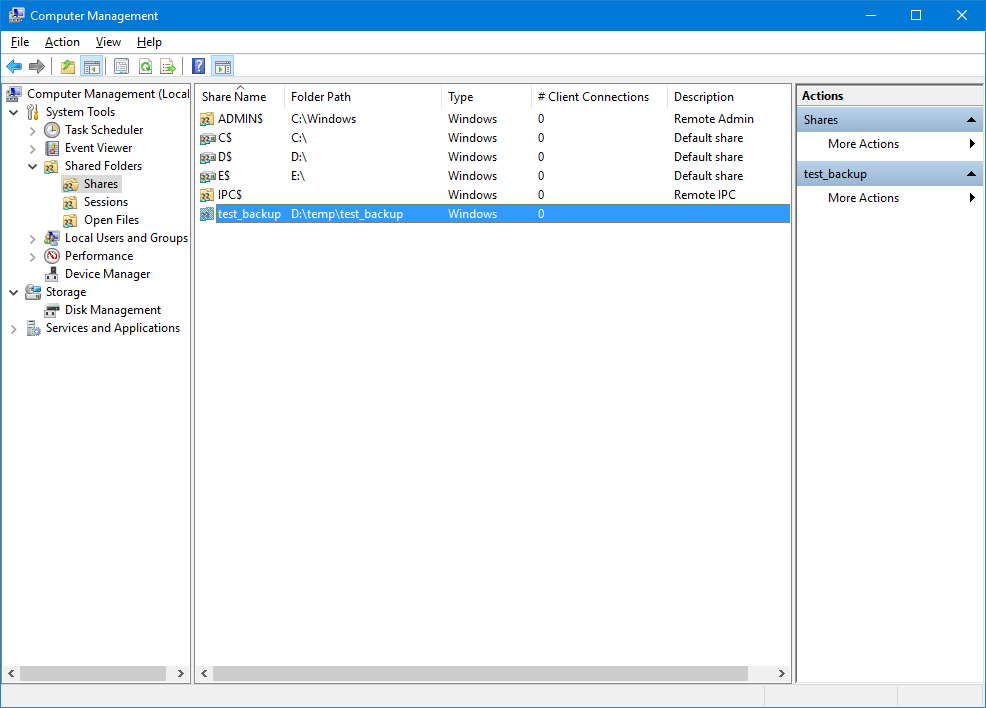
You need to open Computer Management in Windows to add the shared folder:
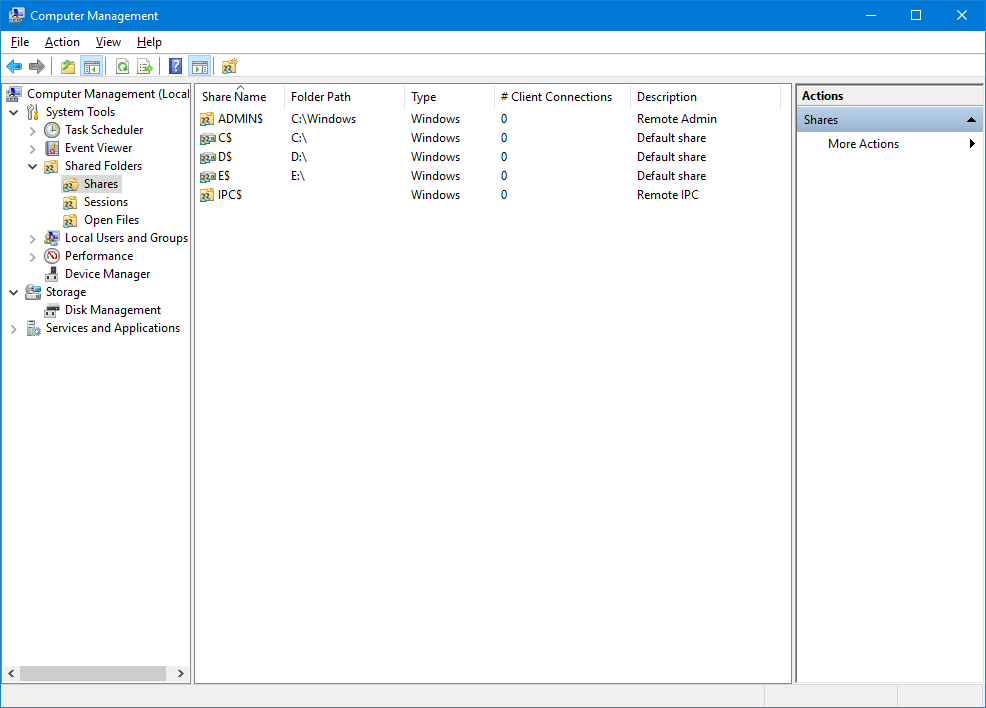
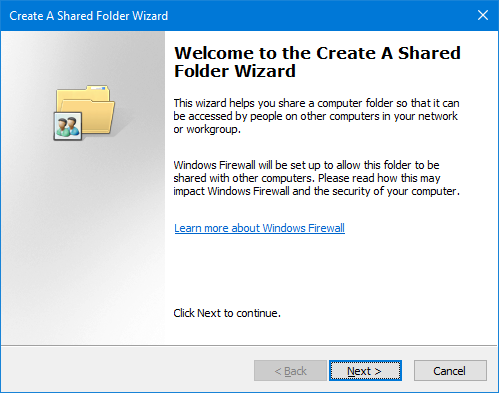
After selecting the Shares item, click on New Share in the Action menu. A wizard will be launched:
Choose the local folder to be shared:
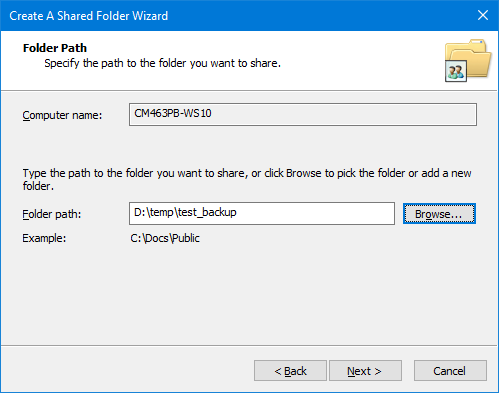
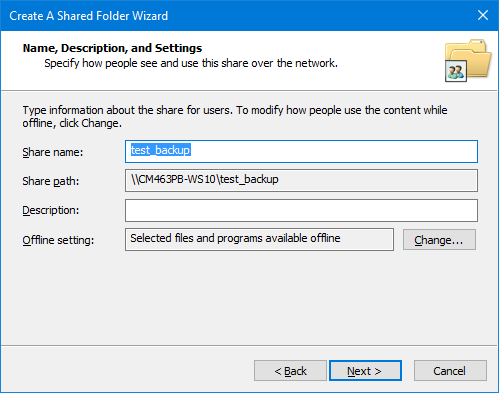
Choose the name of the share:
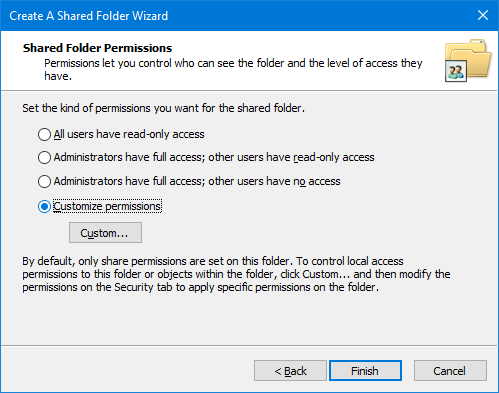
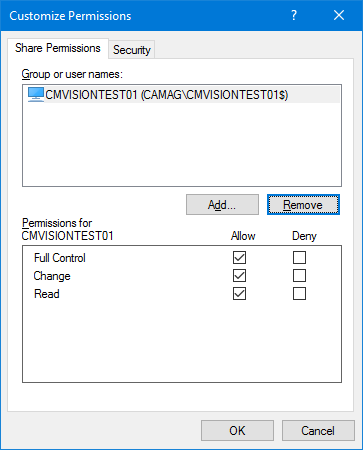
Select Customize permissions and then click on Custom…:
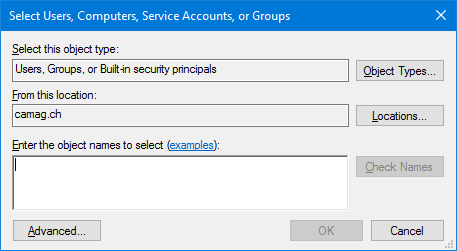
A new user should be added by clicking on Add:
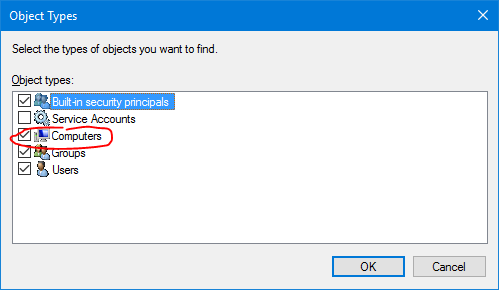
Click on Object Types…:
You need to check Computers
Now you can type (and use Check Names) the computer A name:

Give the Full Control to computer A.

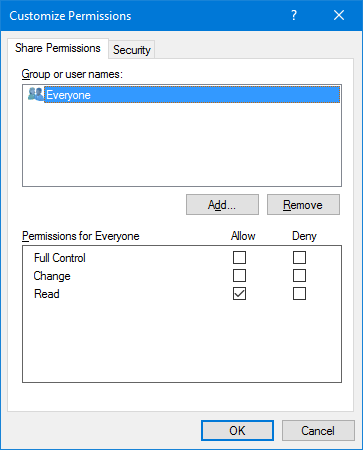
You can remove the group Everyone if needed:
Finish the wizard:
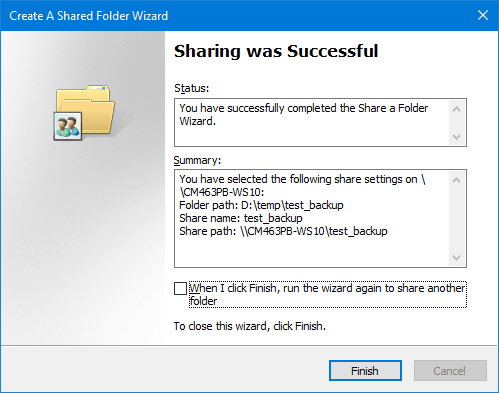
The share now exists:
Setting backup folder: retry
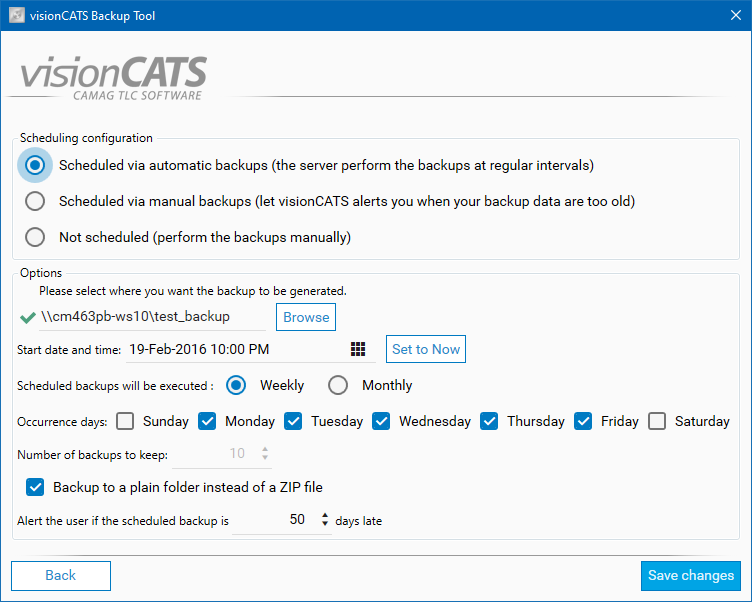
Now you should be able to select the network share, and it will be marked as available:
Note
As network share drive mapping is user specific, it will not work for the backup, the UNC (Universal Naming Convention) address should be used.