Installation of HPTLC PRO drivers
USB Driver
The signed USB driver must be installed in order to use HPTLC PRO Modules.
Note
There is one single USB driver for all HPTLC PRO Modules. The driver only needs to be installed one time for all HPTLC PRO Module which are (or will be) connected to the PC.
Important
HPTLC PRO Drivers installed before September 2020, or with the driver files provided by visionCATS 3.0, may expire. In that case, please uninstall the expired driver first, and then follow the procedure described in the next sections.
To troubleshoot USB connection issues, see Troubleshooting USB connection errors for HPTLC PRO Modules.
First, connect the HPTLC PRO Module to the PC by using a standard USB cable.
Automatic installation by Windows Update
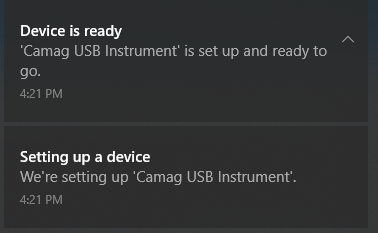
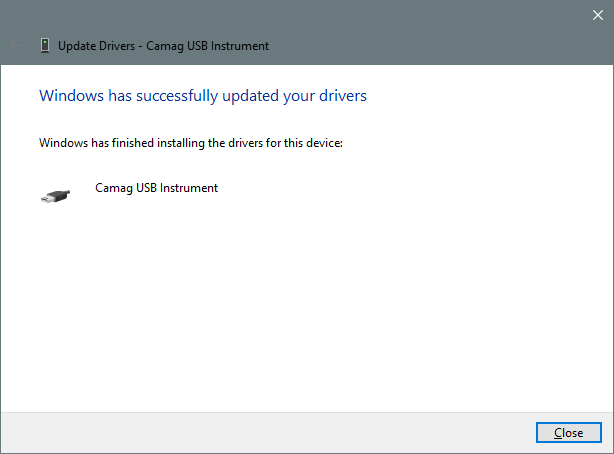
In most cases, and if he PC has a valid internet connection, the USB driver will be automatically installed by using Windows Update. This process usually lasts a few seconds, where the following Windows notifications will appear:
Manual installation
There are several situations where the automatic installation of the driver is not performed:
When the Windows Update service is not accessible or blocked by some organization or PC related configuration.
When the PC does not have a valid internet connection.
In such cases:
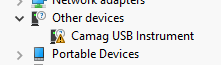
Open the Windows Device Manager (right-click on the Windows icon, then select Device Manager)
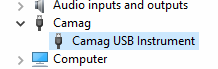
The HPTLC PRO Module should appear as Camag USB instrument in the Other devices group in the Windows Device Manager window.
Right-click on the module and select Update driver
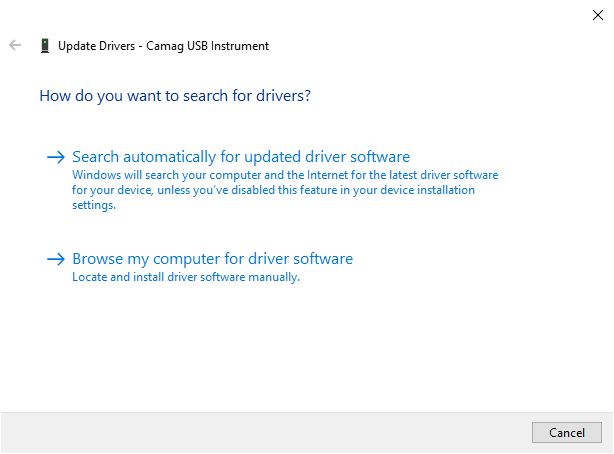
If the PC has a valid internet connection
Choose Search automatically for updated driver software
The driver installation should be finished after a few seconds
Without internet connection, or when the previous method did not work
Choose Browse my computer for driver software
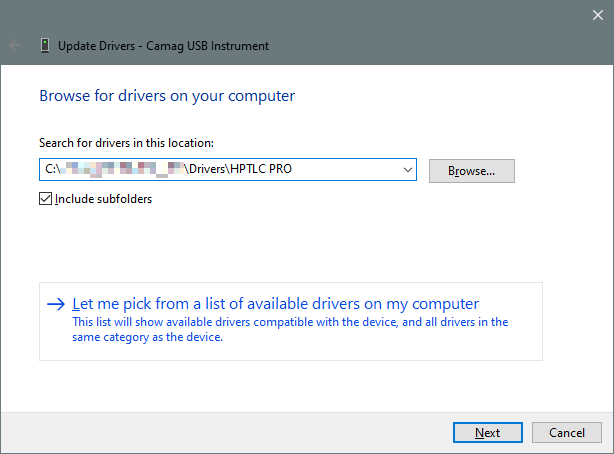
Browse… to select the driver folder, and hit Next.
Note
The regular USB Driver is provided with the installation package. See Parts supplied.
Confirm the installation, in case of some security warnings are displayed
Installation end
At the end of the installation, the HPTLC PRO Module should appear this way in the Windows Device Manager:
The HPTLC PRO Module should appear immediately in visionCATS and in the HPTLC PRO maintenance tool.
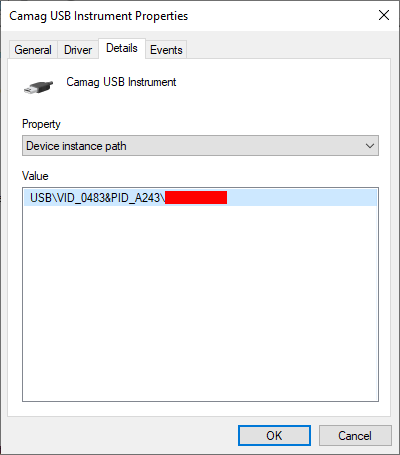
Note that each connected HPTLC PRO Module has a corresponding Camag USB Instrument entry. It is possible to identify each module by double-clicking on the entry, going to Details and selecting Device instance path. The serial number of the module is the last part of the path (in red in the following capture):
DFU Driver
The firmware upgrade for HPTLC PRO Modules requires the specific DFU driver to be installed manually (file Drivers/HPTLC PRO/DFU/dpinst_amd64.exe).
If a firmware upgrade procedure is started while the driver is not installed, the module will be blocked in DFU mode and the firmware upgrade will fail with the UnableToSwitchToDfu error. The main LED button is switched off, like if the module itself was switched off (though it is not the case). If this happens, please follow these steps:
Install the missing driver
Switch off the module, by pressing on the main LED button during at least 5 seconds
Switch on the module again, by pressing on the main LED button
Retry the firmware upgrade